
By the time you’ve chosen all your photographs and artworks for framing, slaved over mat colors and styles, and compared hundreds of frame samples, you’re probably exhausted – ready to just hang it up and forget about it for a decade!
But after all that effort, this is the last thing you should do. It’s important to continue to care for your framed piece, so the time and money you spent doesn’t go to waste. Don’t worry – it’s nothing too involved as long as you do it regularly!
The Pictures Themselves
 Before we get to the additions, let’s talk a bit about the images themselves. A lot of people have beautiful old photographs they are eager to display – pictures from when they or their parents were young, or sepia-toned cityscapes or street scenes.
Pieces like that can make for beautiful wall decor, but they are likely your only copy. In such cases, we recommend having the images scanned and displaying prints instead. This way you can keep your delicate, antique originals safely packed away – out of light and other damaging environmental factors – and still show off your special memories.
Scanned images can be touched up, if time has faded or discolored the photo, or they can be left as-is, for that authentic old fashioned look. Even if you are bound and determined to frame the originals, having them scanned first is advisable. That way if anything happens to the image, you have a back up.
(We offer quality artwork scanning and fine art printing just for these situations!)
Cleaning the Frame
If you bring your artwork to a professional framer, you’re likely to receive a finished product fully finished on the back. This means nails or framer’s points have been hammered in to keep the backing in place, and protective paper tape has been applied to keep out dirt and bugs, and give the back a clean look.
This kind of framed piece should not be taken apart and cleaned – it is intended to be permanently sealed. In these cases, you shouldn’t need to do much more that dust your frame regularly and maybe give the glazing (glass or plexiglass) a wipe from time to time (see next section).
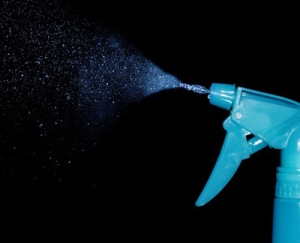
If your frame has a smooth or shiny finish, it is likely varnished or lacquered. It is fine to use a furniture cleaner on this type of frame, but be sure to spray the cloth, not the frame itself. Excess cleaner could be absorbed into the frame and warp or discolor it.
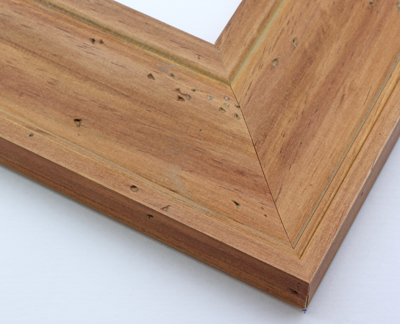
If your wooden frame is a bit rough and dull, it’s probably raw, unfinished wood. In this case, do not use a furniture spray. Instead, dampen a cloth just slightly with water and wipe away any stubborn dust or dirt.
Whichever type of wood, if the frame has grooves or carvings, a soft toothbrush or cotton swab can clean out any small indentations.
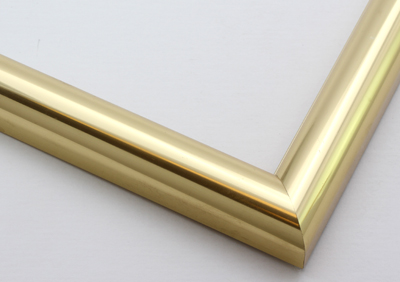
Aluminium, silver- or gold-colored metal frames can be cleaned with a damp cloth. If there is some particularly stubborn dirt or grease, add a little bit of gentle soap to the cloth.
If your frame is solid pewter, or sterling silver, you may use a cleaner designed for that metal. Again, apply it to the cloth first, not the frame. If you are unsure of the frame’s material, try out your cleaning method on the back or side where it won’t show.
Cleaning the Glazing
In most cases, your glass or acrylic cover should need only dusting, or perhaps a quick wipe down with a damp cloth to clean up fingerprints or splatters.
However, if the piece was not sealed when framed – maybe you have a store-bought frame, or you like to swap out the artwork once in awhile – you can take the frame apart and clean the glass fully when changing the image or if you’ve noticed dust working its way inside.
- First lay a soft cloth on your working surface. Never place a frame face-down on anything else – no matter the quality, frames do get scratched. Place the frame on the cloth and carefully remove the backing.
- Place the artwork and backing
 somewhere safe, well away from the cleaning spray or potential water splashes.
 - Remove the glazing. If it is glass, you can use a designated glass cleaner to clean both sides. Alternately, you can use soap and water. If the glazing is acrylic (plexiglass), use soap and water only.
Do not use glass cleaner. - Clean the inside first. That way if you inadvertently get fingerprints on the outside, you can remove them once the frame is reassembled. If you are using soap and water, set the clean glazing aside to dry. It’s best to give it a few hours – any latent moisture can create condensation on the inside of the cover and damage your artwork/photograph.
Reassemble the frame and display it again. Good as new!
See the full article on this topic here: Caring for Your Picture Frame
At KeenART Media, we’re always happy to help. If you have any questions about our products or services, please don’t hesitate to contact us!

Great article! I’ve always been interested in pictures and art. I recently got a new painting—Soest Gerard Mother and Child by II Sodoma—and I’ve been searching for a type of picture frame to put them in. If you had an article about choosing the right frame, that would be perfect! But, in the meantime, I’ll be sure to follow your suggestions by regularly cleaning the frames on my other paintings. Thanks for sharing!
LikeLiked by 1 person
Thanks for commenting, Lily!
Picking the ideal frame for your new piece is definitely an important (and time consuming) part of the process! We do indeed have a post about picking the best frame, and you can find it here. We also have a more in depth article on our website!
Best of luck to you and congrats on your beautiful new painting!
LikeLike